|
|
Post by kmg on Apr 10, 2015 18:34:21 GMT -6
TH Tag
Make a Tim Holtz type tag (there are many tutorials available)
Tag may be any size you would like
If you would like you can share a link with your inspiration, but not needed for challenge.
Deadline May 30th
Auction dollars- $3.00
|
|
|
|
Post by unforgettable on Apr 10, 2015 23:08:22 GMT -6
cool beans! will add to the list!
|
|
|
|
Post by scraprageous on Apr 18, 2015 15:16:55 GMT -6
Inky fingers and lots of bottles later - here is my tag. inks, smearing with tissue, sprays, embossed item, then ink again, rub ons, yarn, fabric, wooden piece, punch, stickers and a die cut. Whew - that is a lot of product (without including the various adhesives) for one little tag    20150418_160100 20150418_160100 by scraprageous, on Flickr |
|
|
|
Post by unforgettable on Apr 19, 2015 20:18:48 GMT -6
Lucinda,
I get bogged down in one method which goes hand in hand with my lack of imagination. I'm sure this is on the TH site, but could you detail how you did the tag? I need to expand my horizons. Btw, lovely tag. I really like it.
Thanks.
K
|
|
|
|
Post by kmg on Apr 20, 2015 7:26:24 GMT -6
Great job
|
|
|
|
Post by scraprageous on Apr 20, 2015 7:56:59 GMT -6
Kathy - no time to redo and take pics, but here are some basics (here is link on my blog to an old one I took pics of steps www.scraprageous.blogspot.com/2010/12/christmas-tag.html I only had one of the actual items he used, so went with what I had on hand) 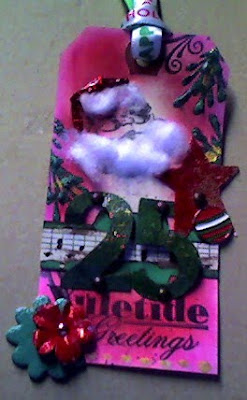  His original has the white letters and is one of the 6" shipping tags. My tag is only 2.5" x 3.75" - considerably smaller as it is what I had on hand. ________________________________________________________________________________Anyway - for this tag. Started with the birds - they match the book I want to use the tag in, so went with color pallet from there. First, I grabbed a tag (this one isn't the super large size - I used the size I wanted) Next - I applied ink from my Ranger ink pads to my non-stick mat (I think waxed paper would work) Then I usually spritz ink with water for more watercolor look, but I wanted stronger colors so didn't do this part. Then I pushed the tag, face down into the inks. Next, I used a tissue to rub any edges smooth (You can use a foam pad like he does, but I am running low and didn't want mixed colors on the ones I have left) Let that dry a bit. Next, I spritzed with ink - yellow in this case, but you can use glimmer mist, Ranger spray mists, just plain water for more of a water drop feel - whatever. Let dry (or use your heat gun to dry quicker) While drying - emboss a piece of paper and ink it Back to tag - I added some rub - ons. Punch out the circle (or whatever shape. In his, he put a round metal tag on top - I went with the embossing behind because it matches my book this tag will go into better). Putting the rub ons first allows you to choose a bit of where you want to punch out a shape. adhere the embossed words to the back of the tag - showing through the circle. next - add the two birds then - the red string and little wooden piece finally - a strip of gold fabric for the 'ribbon' Hope one of these two helps some. Biggest thing with these - patience or a heat gun I cut a foamy apple sticker in half to add some sparkle to the card without looking like an apple. The two birds are really glittery, and I wanted some color. |
|
|
|
Post by scraprageous on Apr 20, 2015 10:31:34 GMT -6
Kathi - this will take a bit to finish - but here is the start - let me know if it helps grab some items you think you may want for the tag - get a loose idea going. I am thinking of a fun tag for hanging out and grilling. 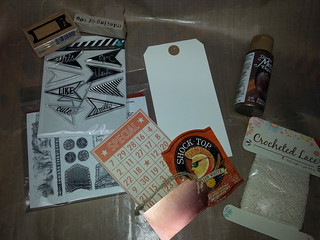 20150420_111347 20150420_111347 by scraprageous, on Flickr I have no idea if I will use all materials or not, but this is where I started. Next - background color - what do I want? I think this is it 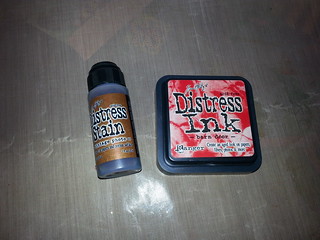 20150420_111431 20150420_111431 by scraprageous, on Flickr so - ink up the mat and spritz with water  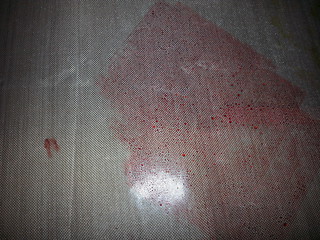 this is my tag - press in main time 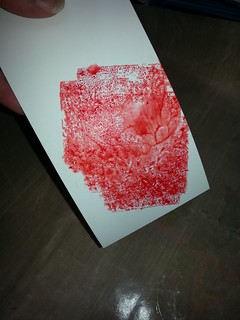 20150420_111532 20150420_111532 by scraprageous, on Flickr rub around to pick up any excess ink 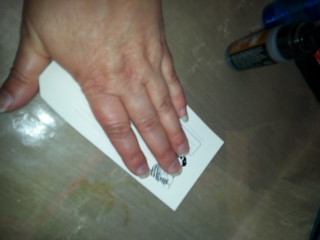 20150420_111543 20150420_111543 by scraprageous, on Flickr 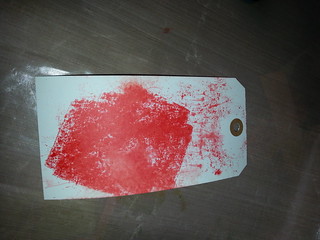 20150420_111548 20150420_111548 by scraprageous, on Flickr spritz with more water - see shape and get an idea (oh no  )  20150420_111619 20150420_111619 by scraprageous, on Flickr tag curls up and flattens when dry (usually) add some distress ink - 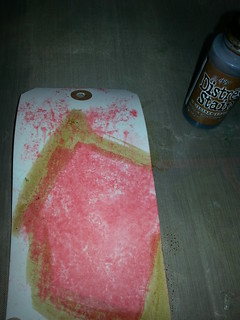 20150420_111645 20150420_111645 by scraprageous, on Flickr add another ink (this one from Making Memories) 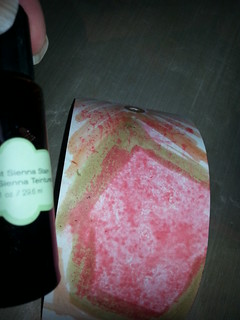 20150420_111723 20150420_111723 by scraprageous, on Flickr and another 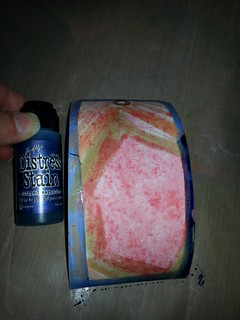 20150420_111749 20150420_111749 by scraprageous, on Flickr finally - spritz with a bit more water and head into work while it dries. 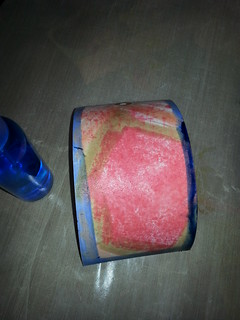 20150420_111807 20150420_111807 by scraprageous, on Flickr |
|
|
|
Post by unforgettable on Apr 20, 2015 19:05:44 GMT -6
Wow!!!!! Thanks for all of the info and pictures! I'm going to try tomorrow. It's kind of yo to give me all the steps when you are pressed for time.
Thanks again!
|
|
|
|
Post by scraprageous on Apr 22, 2015 12:16:17 GMT -6
Started out the day with a dry tag 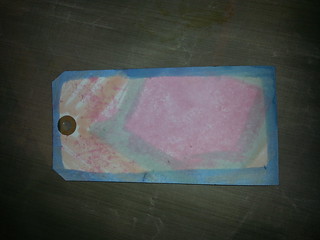 20150422_083609 20150422_083609 by scraprageous, on Flickr so grab some gold spray 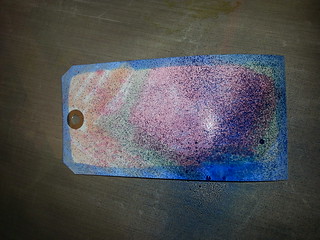 20150422_083813 20150422_083813 by scraprageous, on Flickr That is NOT gold spray  So - add some more distress (let's see if we add more and it gets better - cause that always works ROFL)  20150422_084017 20150422_084017 by scraprageous, on Flickr Hold on - still yuck, but let's keep going - made it this far Add some water - too thick in color hmmm - wonder if the puddles at the bottom will look like sludge?  20150422_084049 20150422_084049 by scraprageous, on Flickr grab the heat gun and let's see what we've done 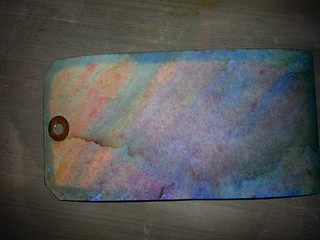 20150422_084326 20150422_084326 by scraprageous, on Flickr hmm - I can work with this so - add some stamped images - some in orange, some in brown 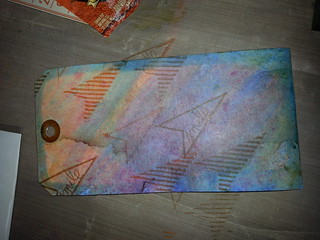 20150422_084624 20150422_084624 by scraprageous, on Flickr this really isn't heading where I thought I would. I like discover (from a swap!) and the lace 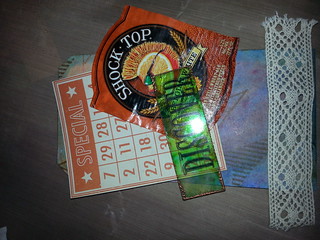 20150422_084838 20150422_084838 by scraprageous, on Flickr add some bug clear dots I made 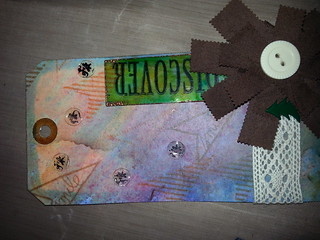 20150422_090027 20150422_090027 by scraprageous, on Flickr add some technique 'washi' tape 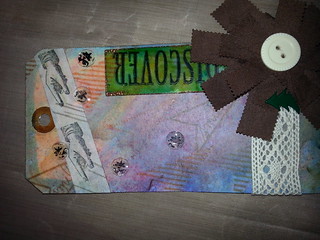 20150422_090305 20150422_090305 by scraprageous, on Flickr Viola - I kind of like it. Ribbon and flower and bling from swap - same with the charm - from a swivel charm swap (swivel from there as well) - 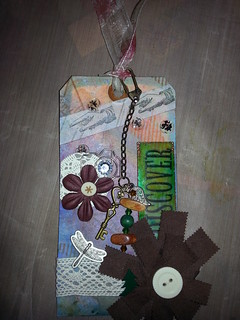 20150422_090939 20150422_090939 by scraprageous, on Flickr |
|
|
|
Post by kmg on Apr 22, 2015 16:18:12 GMT -6
very cute! love the handmade washi
|
|
|
|
Post by unforgettable on Apr 22, 2015 20:01:28 GMT -6
Very nice--thanks for the tutorial!
|
|
|
|
Post by unforgettable on May 29, 2015 19:02:15 GMT -6
I saw a couple tutorials on line, being done by a woman who said she was doing a TH tag. I'll try and recount the steps: The tutorial stated to mist a template, then apply an ink, then place on a cut out. That was inked, then small doo-dads were added. Truthfully, I did not exactly follow the tutorial, but all of the products except the clock face stamp are TH. I hope I get some points for the tag. It's my best one to date. K  search.yahoo.com/yhs/search?p=tim+holtz+youtube+tags&ei=UTF-8&hspart=mozilla&hsimp=yhs-004 search.yahoo.com/yhs/search?p=tim+holtz+youtube+tags&ei=UTF-8&hspart=mozilla&hsimp=yhs-004 |
|
|
|
Post by ceceparsley on May 30, 2015 17:49:58 GMT -6
my TH style dragon tag new size-3x7 hope you like it
|
|
|
|
Post by scraprageous on May 31, 2015 6:26:44 GMT -6
Great Tags!
|
|
|
|
Post by ceceparsley on May 31, 2015 10:55:31 GMT -6
thanks.
Nice work Kathi-is that for a page for Uncle Joe? |
|
|
|
Post by kmg on May 31, 2015 17:34:49 GMT -6
Great tags!
|
|
|
|
Post by unforgettable on May 31, 2015 18:49:15 GMT -6
Thanks! And yes, the tag is for an Uncle Joe page down the road--once I find the poem.
|
|


 )
)
